
Create schedule
Overview
Users can utilize this page to create as many schedules as desired and include as many supported resources in each schedule as required.
Before attempting to create any schedule, please ensure the following:
- You have at least one supported resource in the project for the selected action.
- The resource you intend to add to the schedule belongs to the project where you are creating the schedule. You cannot create a schedule with resources from other projects.
- For VM power operations, cloning, and deletion, the virtual machine you intend to add to the schedule must be in either ON, OFF, or BUSY status.
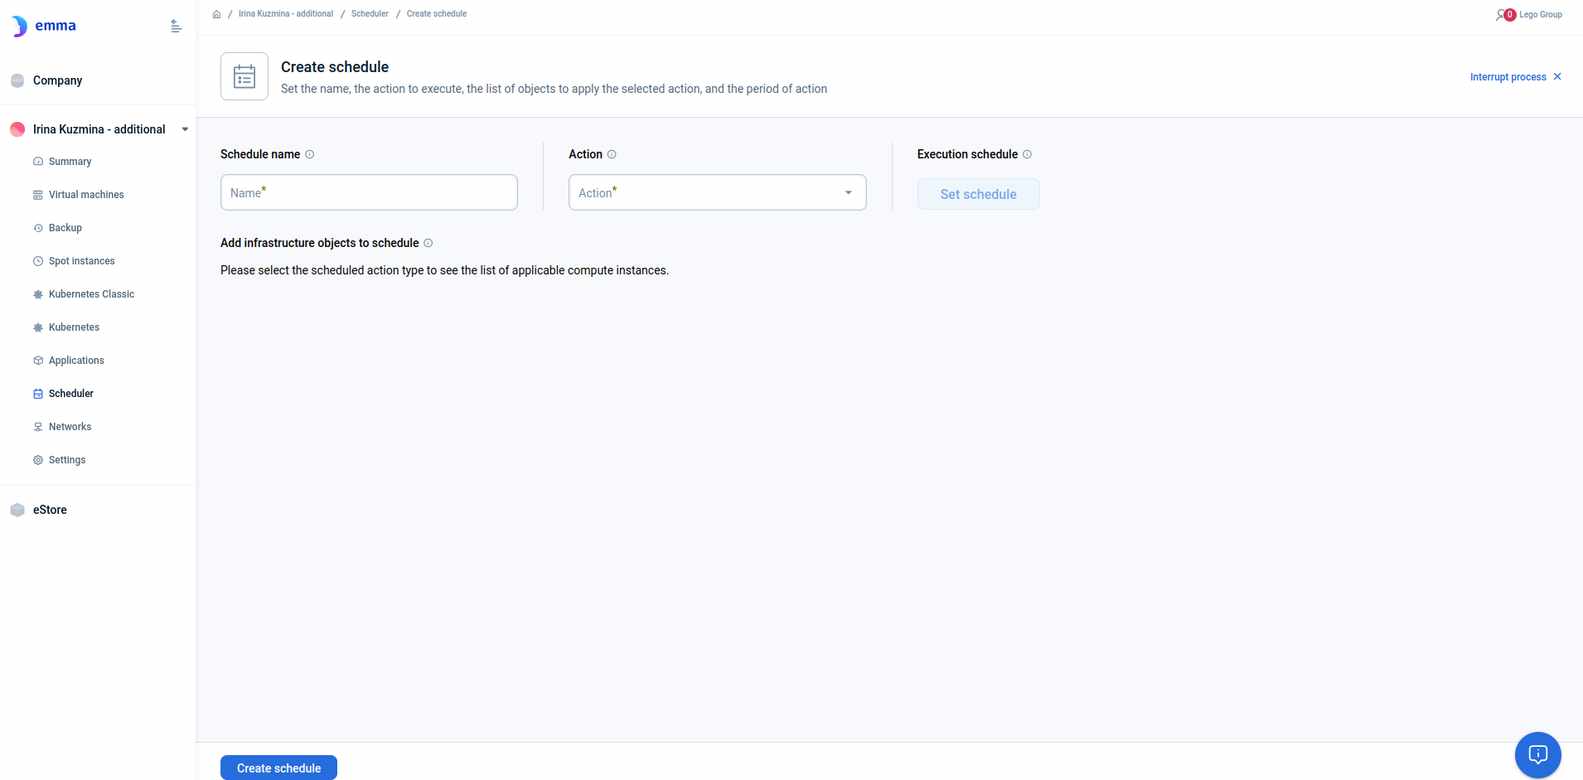
Page description
The page guides users through the process of creation step by step, offering assistance and additional information where necessary.
- Schedule Name: a text field. The link to patterns is available in the FAQ for guidance on naming conventions.
- Initial Action Selection: this section allows users to select the initial action required for the schedule from a dropdown menu. Additional details about each action may be available via a FAQ link.
- Event Date and Time Specification: users can specify the event date and time or intervals with periods and hours. There is a FAQ link providing additional instructions.
- Search line for resources by name: allows users to quickly find resource names by typing the initial letters.
- Resource Selection: users can choose supported resources from the available list. They can mark the checkboxes next to the resources they want to include.
- "+Add to schedule" or "Create schedule" buttons: save the settings once all necessary resources are selected.
- Process Interruption: at any point before finalizing the schedule creation process, users have the option to halt the process using the "Interrupt process x" button located at the top right corner of the page. This button allows users to cancel or exit the schedule creation process if needed.
Actions you can perform on this page
Create a schedule for the selected resources by specifying the recurrence pattern (daily, weekly, monthly, or custom) and the preferred scheduler execution time.
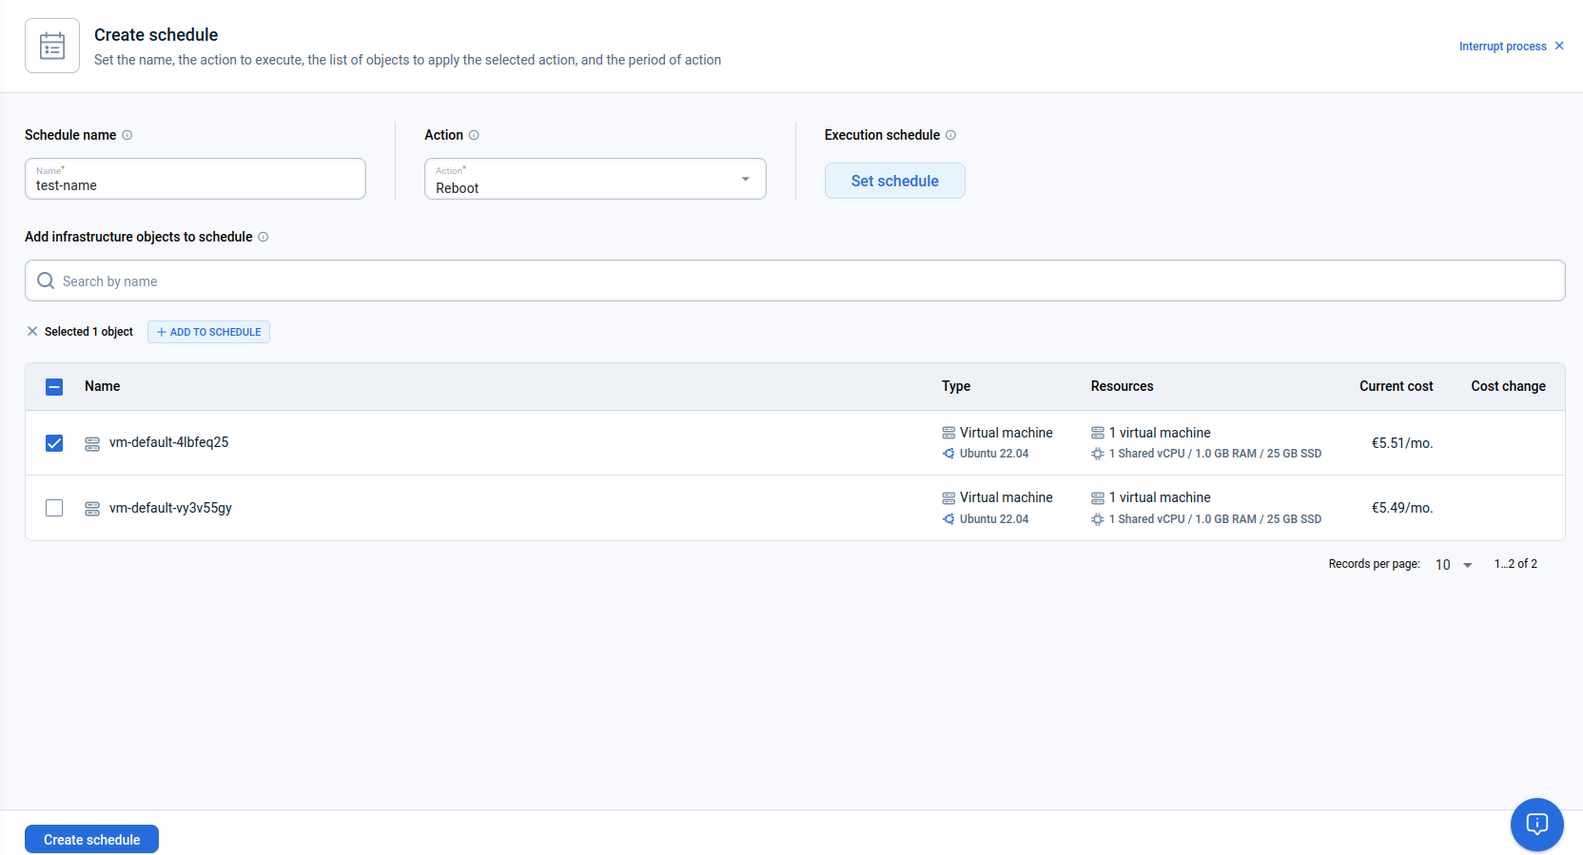
To create a Schedule:
- Provide a name. Reference a pattern from the FAQ.
- Select the initial action required. Details are available in the FAQ.
- Specify the event date and time or intervals with periods and hours by activating the "Set schedule" button. Note: The button remains inactive until an action is chosen. An additional guidance is in the FAQ.
- Use the search bar to quickly find resource names by typing the initial letters.
- Choose resources from the available list. Once all necessary resources are selected, click either the "+Add to schedule" or "Create schedule" button. Your selected resources and schedule settings will be saved, and you'll be redirected to the Schedules page.
- At any point before clicking "+Add to schedule" or "Create schedule," you can halt the process by clicking the "Interrupt process x" button in the top-right corner of the page.
FAQ
What options are available for naming the Schedule?
- You can choose any name provided it meets these criteria: It must consist of alphanumeric characters, hyphens, dots, and underscores; the length can range from 2 to 64 characters.
- You can create multiple schedules using identical names as required.
What actions can I perform with scheduled resources?
- Start: power on virtual machines according to a schedule. For example, to start a virtual machine daily at 9 a.m.
- Shutdown: power off virtual machines according to a schedule. For example, to shut down a virtual machine daily at 5 p.m.
- Reboot: restart virtual machines according to a schedule. For example, to reboot a virtual machine every Friday at 11 a.m.
- Start/Stop: power on and power off virtual machines according to a schedule. For example, to start a virtual machine daily at 9 a.m. and shut it down daily at 6 p.m.
- Apply rightsize recommendations: apply advisor recommendations that reduce a virtual machine’s configuration to better match actual workload and lower costs. This action is typically used when CPU or memory utilization remains low over time.
- Apply upsize recommendations: apply advisor recommendations that increase a virtual machine’s configuration to ensure sufficient performance under sustained high load. This action is typically used when CPU or memory utilization remains high over time.
- Apply delete recommendations: apply advisor recommendations that delete idle virtual machines to eliminate unnecessary costs.
- Apply reallocate recommendations: apply advisor recommendations that move resources to a lower-cost location. Depending on the recommendation, this action can reallocate a virtual machine to another data center, move it to another provider, or reallocate a volume.
- Clone: create an identical copy of an existing virtual machine. For example, to clone a virtual machine every 5th day of the month at 10 p.m.
- Delete: delete virtual machines according to a schedule. For example, to delete virtual machines on the last day of each month at 8 p.m.
What if I want to create a schedule with virtual machines with different statuses?
- It is possible to add virtual machines with statuses ON, OFF, and BUSY in one scheduler.
- It is impossible to add virtual machines with statuses DRAFT and FAILED.
What scheduling options are available, and what do they signify?
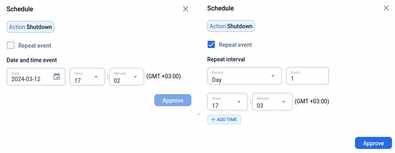
- Date and Time Event: this option is exclusively for non-recurring events. It signifies that an action will execute only once, after which the schedule will pause. You can opt to "Execute now" to run scheduled actions immediately or adjust the date and/or time using the "Edit" function to schedule it for later execution.
- Repeat Interval: this option is utilized for recurring events. It indicates that an action will occur at regular intervals based on the chosen period. You can add an unlimited number of intervals.
- Selectable time intervals for recurring events include:
- Day: Allows you to set an action to occur every "N" days. There are no restrictions on the selection of days (1 or 9876543).
- Week: Enables you to set an action to occur every "N" week on a specific day(s) of the week. There are no limitations on the choice of weeks (1 or 9876543).
- Month: Lets you designate the days of the month when the scheduled action will be executed.
- Custom: Offers the option to set an interval using a cron expression.
What actions can I take depending on my project role?
- Users with “Manage” infrastructure permissions in the project can perform any actions with any Schedules.
- Users with “Operate” infrastructure permissions in the project can perform any actions with Schedules for Start, Shutdown, Reboot, and Start/Stop.
- Users with “Read” infrastructure permissions in the project can only see a list of Schedules and their detailed information, but can not perform any actions with any Schedules.
Last updated on 1 Aug 2026