
Volume details - General Info
Overview
This page provides information about the volume, including the provider, location, storage information, attached instance, status, cost, and operating system (for system volumes).
Information on this page
This page provides detailed information about the volume, covering the following categories of volume attributes:
- Volume attachment details - Virtual machine name, link to its page, and service name. If the volume is not connected to any virtual machine, this block will not be shown.
- Provider – Information about the provider name, server geographical location, and provider data center name.
- OS – Details about the operating system (e.g., “Ubuntu”) and the OS architecture (e.g., “x86-64”). OS is displayed only for system volumes
- Storage – Information about the storage volume type and size.
Actions you can perform on this page
On this page, you can perform actions using the buttons or the "Ellipsis" menu.
Edit a Volume
To edit a volume:
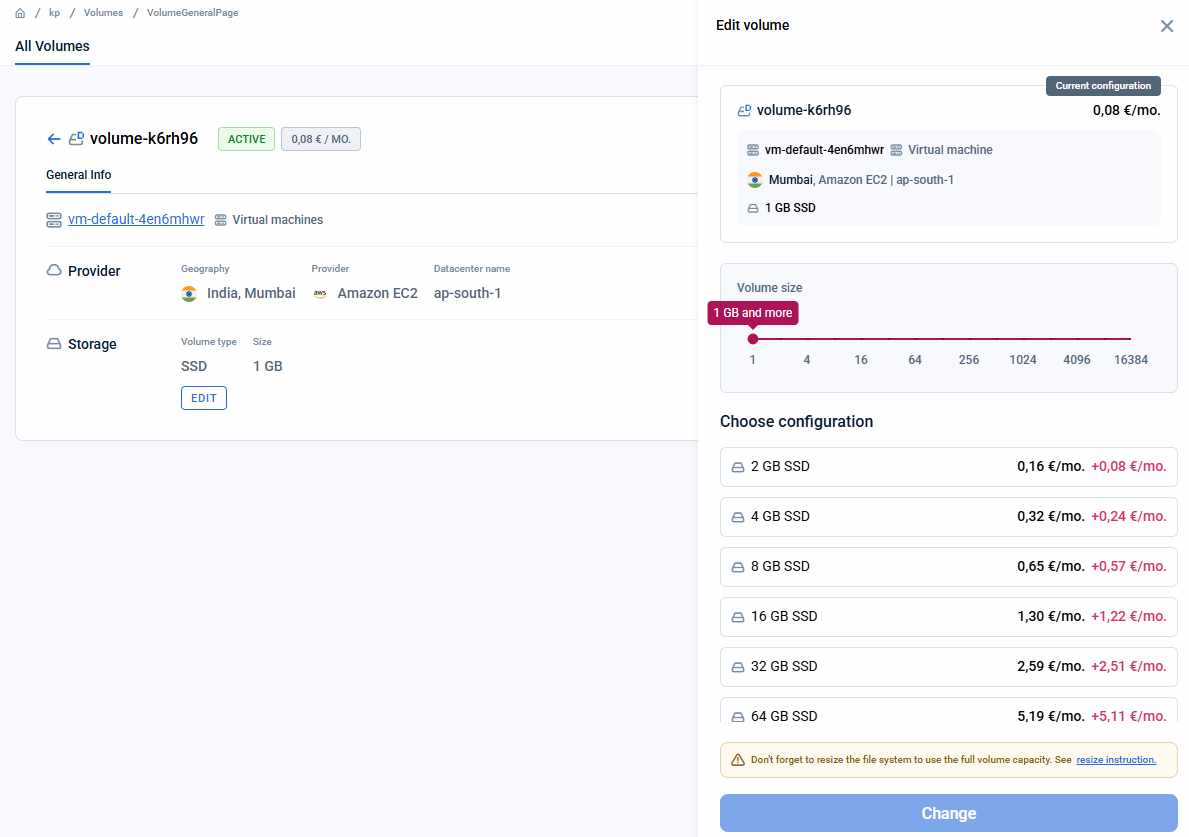
- Click the “Edit” button in the volume’s “Storage” block.
- In the “Edit volume” sidepage, select your preferred volume configuration from the available options.
- Click “Edit” to confirm and start the editing process.
Important Points to Consider:
- Only users with “Manage” rights in the project can edit a volume.
- Volume size can only be increased; reducing the size is not supported.
- Both system volumes and data volumes can be edited.
- Attached volumes can only be edited when the virtual machine is in the “ON” or “OFF” state.
- Volumes must be in the “Active” or “Available” state to be edited.
- After resizing a volume, the additional storage capacity may not immediately be usable by the operating system. To fully utilize the expanded volume, you must manually resize the file system. Refer to the article to find the instructions.
Attach volume
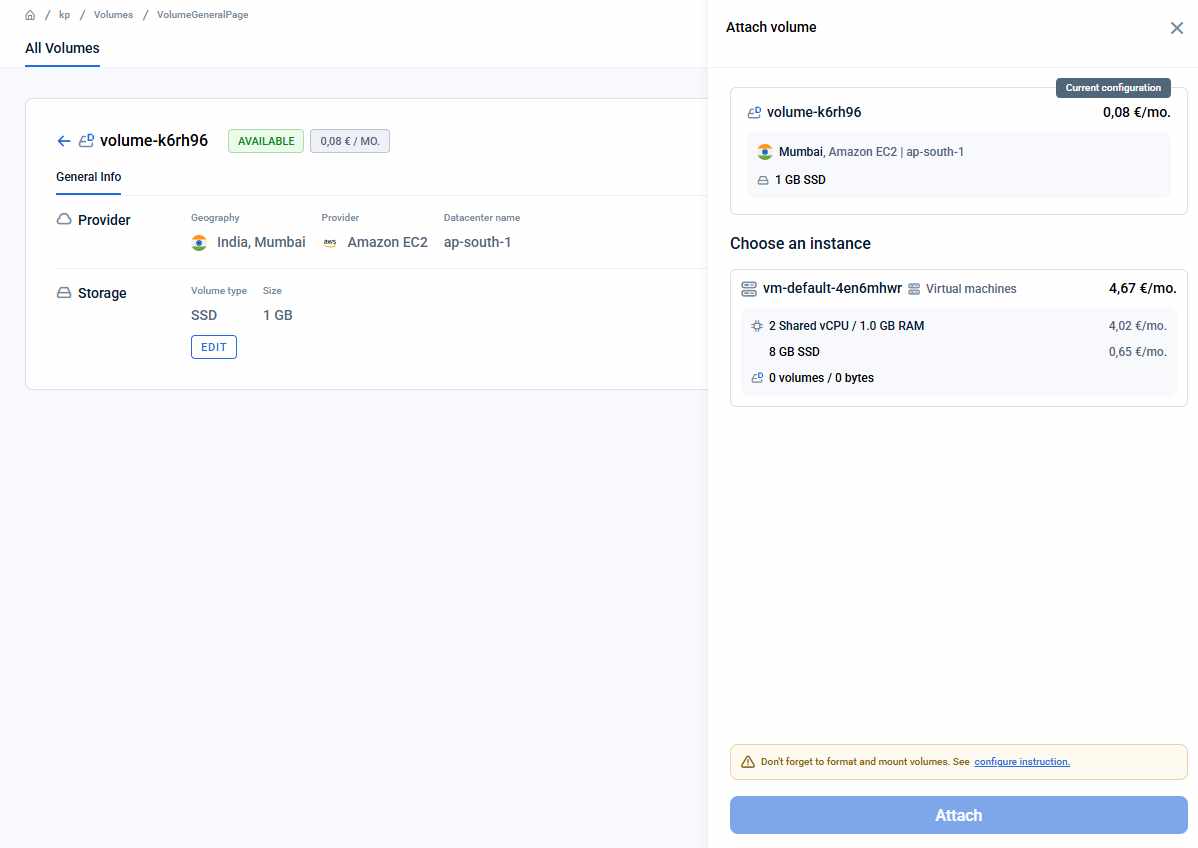
To attach a volume to an instance, open the context menu of the volume and select the “Attach“ option. This will open the “Attach volume” sidepage. In the sidepage, you’ll find a list of instances that the volume can be attached to. The list is sorted by instance cost per month. To begin the attaching process, select the virtual machine and click on the “Attach“ button.
Important Points to Consider:
- Only users with “Operate” and higher access in the project are allowed to attach volumes.
- A volume can only be attached if it is in the same data center and belongs to the same provider as the instance.
- The action is only applicable to data volumes.
- A volume can only be attached to a virtual machine that is in the “ON” or “OFF” state.
- Volumes must have the “Available” status to be eligible for attachment.
Detach volume
To detach a volume:
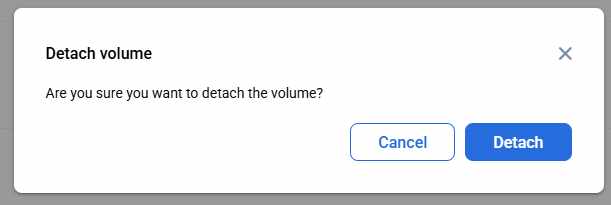
- Open the context menu for the volume and select “Detach” from the dropdown.
- Confirm by clicking the “Detach” button to start the process.
The volume detaching process will start.
Important Points to Consider:
- Only data volumes can be detached. The system volume of a virtual machine cannot be removed.
- Only users with “Operate” and higher access in the project can detach volumes.
- Volumes cannot be detach when virtual machine is not in “ON” or “OFF” state.
- Volumes cannot be detach when volume is not in “Active” state.
Delete volume
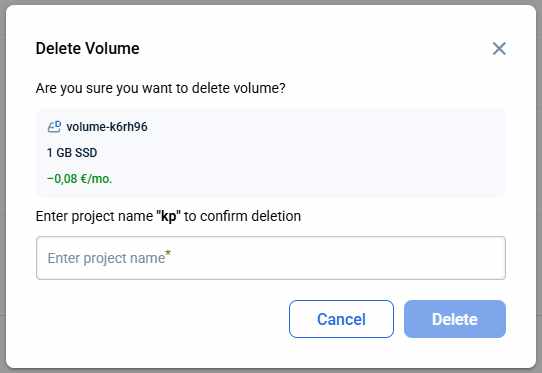
To delete a volume click on its context menu icon, select the “Delete” option from the dropdown menu. The “Delete volume“ modal window will appear. Confirm deletion by entering the project name and click on the “Delete” button to initiate the process.
Important Notes:
- Only users with “Manage” rights in the project can delete volumes.
- Deleting a volume is permanent. The volume cannot be recovered, and all data will be permanently lost.
- Only data volumes can be deleted. The system volume of a virtual machine cannot be removed.
Last updated on 1 Aug 2026