
Enable platform SSH access
Overview
To open the in-browser Console (web terminal) for a virtual machine, the platform needs its own SSH key on that machine. If a VM was created without the platform SSH key, you can add it at any time from the VM page.
You stay in control: you place the key on your VM yourself, and the platform enables access only after it confirms a working SSH connection. The key you install is a public key, which is safe to copy onto a server.
The flow has four parts: download the platform's public key, connect to your VM, add the key to the VM's authorized_keys file, and run a connection check. On success, the Run console button becomes available.
Before you begin
Make sure you have the following, or the check will fail:
- You can already sign in to the VM over SSH (with your own key or a password) as the VM's main user or
root. - The virtual machine is running.
- Inbound SSH (TCP port 22) is allowed by the VM's security group, so the platform can reach it.
- You know the VM's public IP address and its default login user (for example,
ubuntufor Ubuntu images).
Step 1. Open the install panel
Open the virtual machine from its card, its details page, or the actions (...) menu. When the platform SSH key is not installed, the control reads Enable platform SSH access — click it. The panel opens on the right.
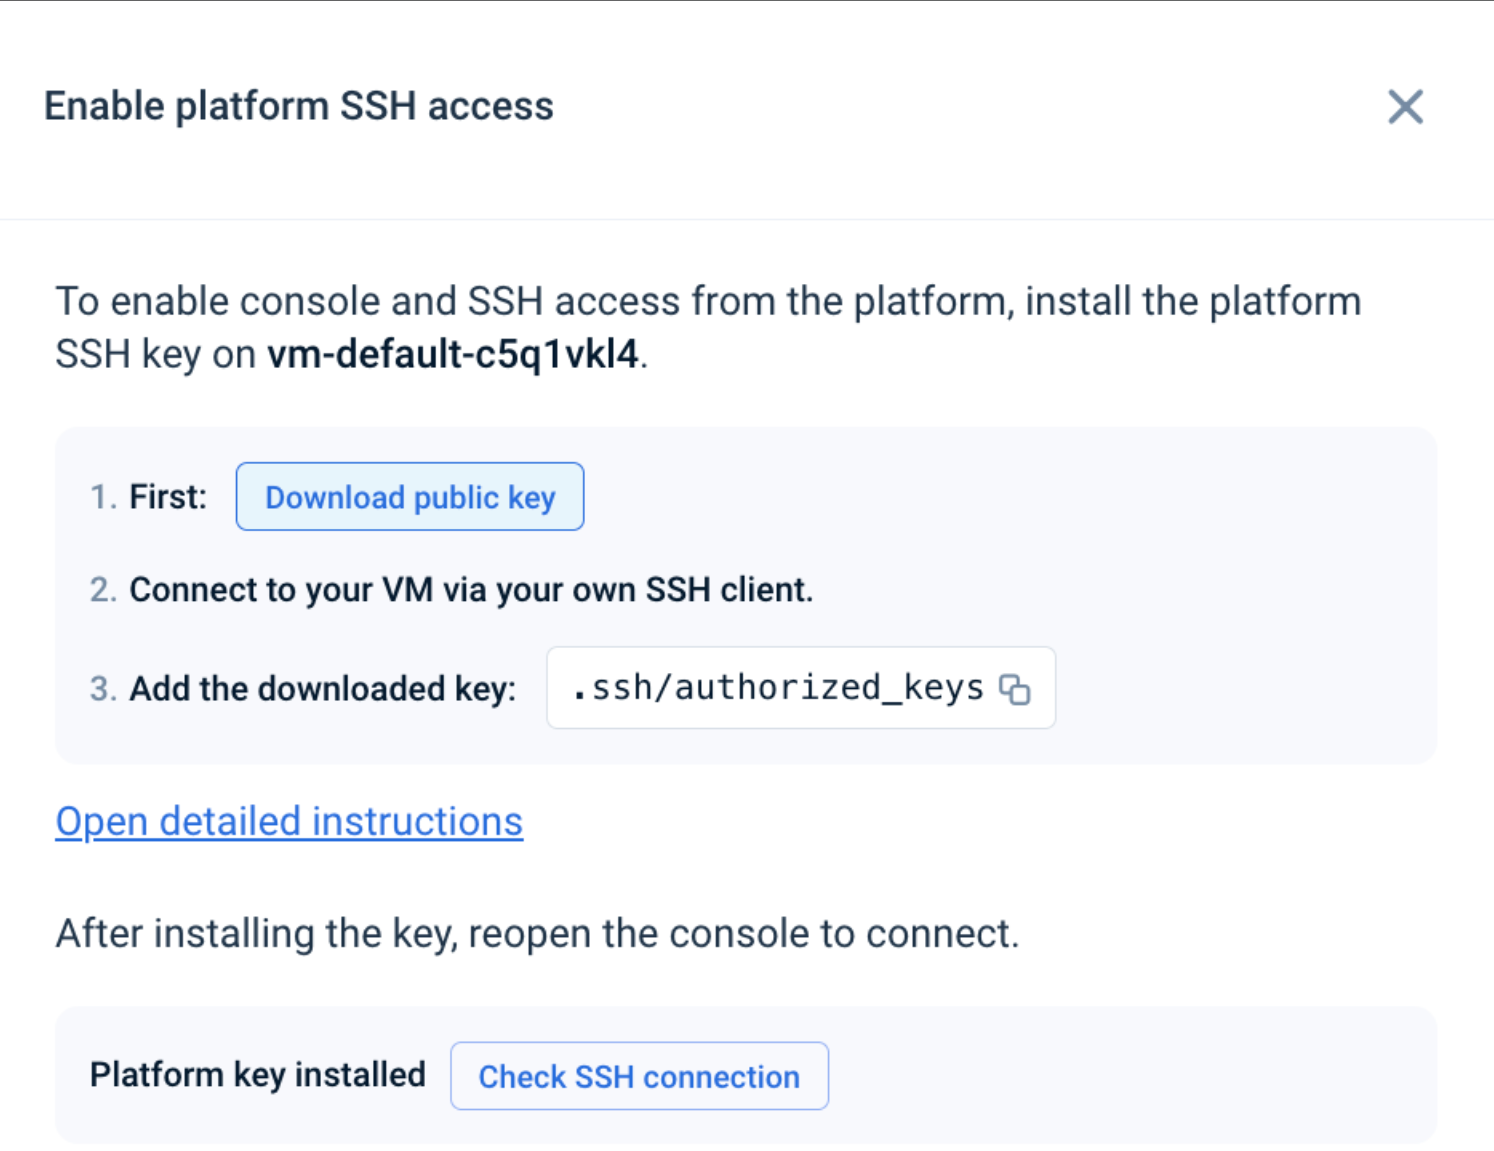
Step 2. Download the public key
In the panel, click Download public key. Your browser saves a file named emma-platform-ssh-key-<vm-name>.pub (usually to your Downloads folder). The file holds a single line that begins with ssh-rsa — you will add this exact line to your VM.
Step 3. Connect to your VM
Sign in to the VM with your existing access. Replace <user> with the VM's default login user and <vm-public-ip> with its public IP address:
ssh -i <path-to-pem> <user>@<vm-public-ip>
From Windows, use the built-in ssh command in PowerShell, or a client such as PuTTY.
Step 4. Add the public key to your VM
Append the line from emma-platform-ssh-key-<vm-name>.pub to the authorized_keys file of the user you connect as — ~/.ssh/authorized_keys for a normal user (for example, /home/ubuntu/.ssh/authorized_keys), or /root/.ssh/authorized_keys if you log in as root.
Connect to the VM (Step 3) and prepare the file with the correct permissions:
mkdir -p ~/.ssh && chmod 700 ~/.ssh
touch ~/.ssh/authorized_keys && chmod 600 ~/.ssh/authorized_keys
Then add the key on a new line. Minimal cloud images often do not ship with nano, but vi/vim is present on almost every distribution:
- vi / vim — run
vi ~/.ssh/authorized_keys, pressGthenoto open a new line, paste the key, then pressEscand type:wqto save and quit. - nano (if installed) — run
nano ~/.ssh/authorized_keys, paste the key on a new line, then pressCtrl+O,Enter,Ctrl+X. - No editor — append it from the shell, keeping the key on one line:
echo "PASTE_THE_PUBLIC_KEY_HERE" >> ~/.ssh/authorized_keys
On RHEL-based systems (RHEL, CentOS, Rocky Linux, AlmaLinux, Fedora, Oracle Linux), restore the SELinux context afterwards, or key authentication will silently fail:
restorecon -Rv ~/.ssh
Alternative: copy the key with one command from your computer
Instead of editing the file on the VM, you can pipe the key into it from your local machine. The command authenticates with your own private key (-i <path-to-pem>, the same key as in Step 3) and appends the platform key with safe permissions.
macOS / Linux:
cat ~/Downloads/emma-platform-ssh-key-<vm-name>.pub | ssh -i <path-to-pem> <user>@<vm-public-ip> "umask 077; mkdir -p ~/.ssh && cat >> ~/.ssh/authorized_keys"
Windows PowerShell:
type $HOME\Downloads\emma-platform-ssh-key-<vm-name>.pub | ssh -i <path-to-pem> <user>@<vm-public-ip> "umask 077; mkdir -p ~/.ssh && cat >> ~/.ssh/authorized_keys"
The Pseudo-terminal will not be allocated message is expected and harmless. If you see Permission denied (publickey), point -i to the private key you normally use to access this VM.
Step 5. Verify and enable access
Return to the Enable platform SSH access panel and click Check SSH connection.
- On success, the status shows SSH enabled and the VM's control changes to Run console. You can now open the Console.
- If it shows Connection failed, see Troubleshooting below, fix the issue, and click Check SSH connection again.
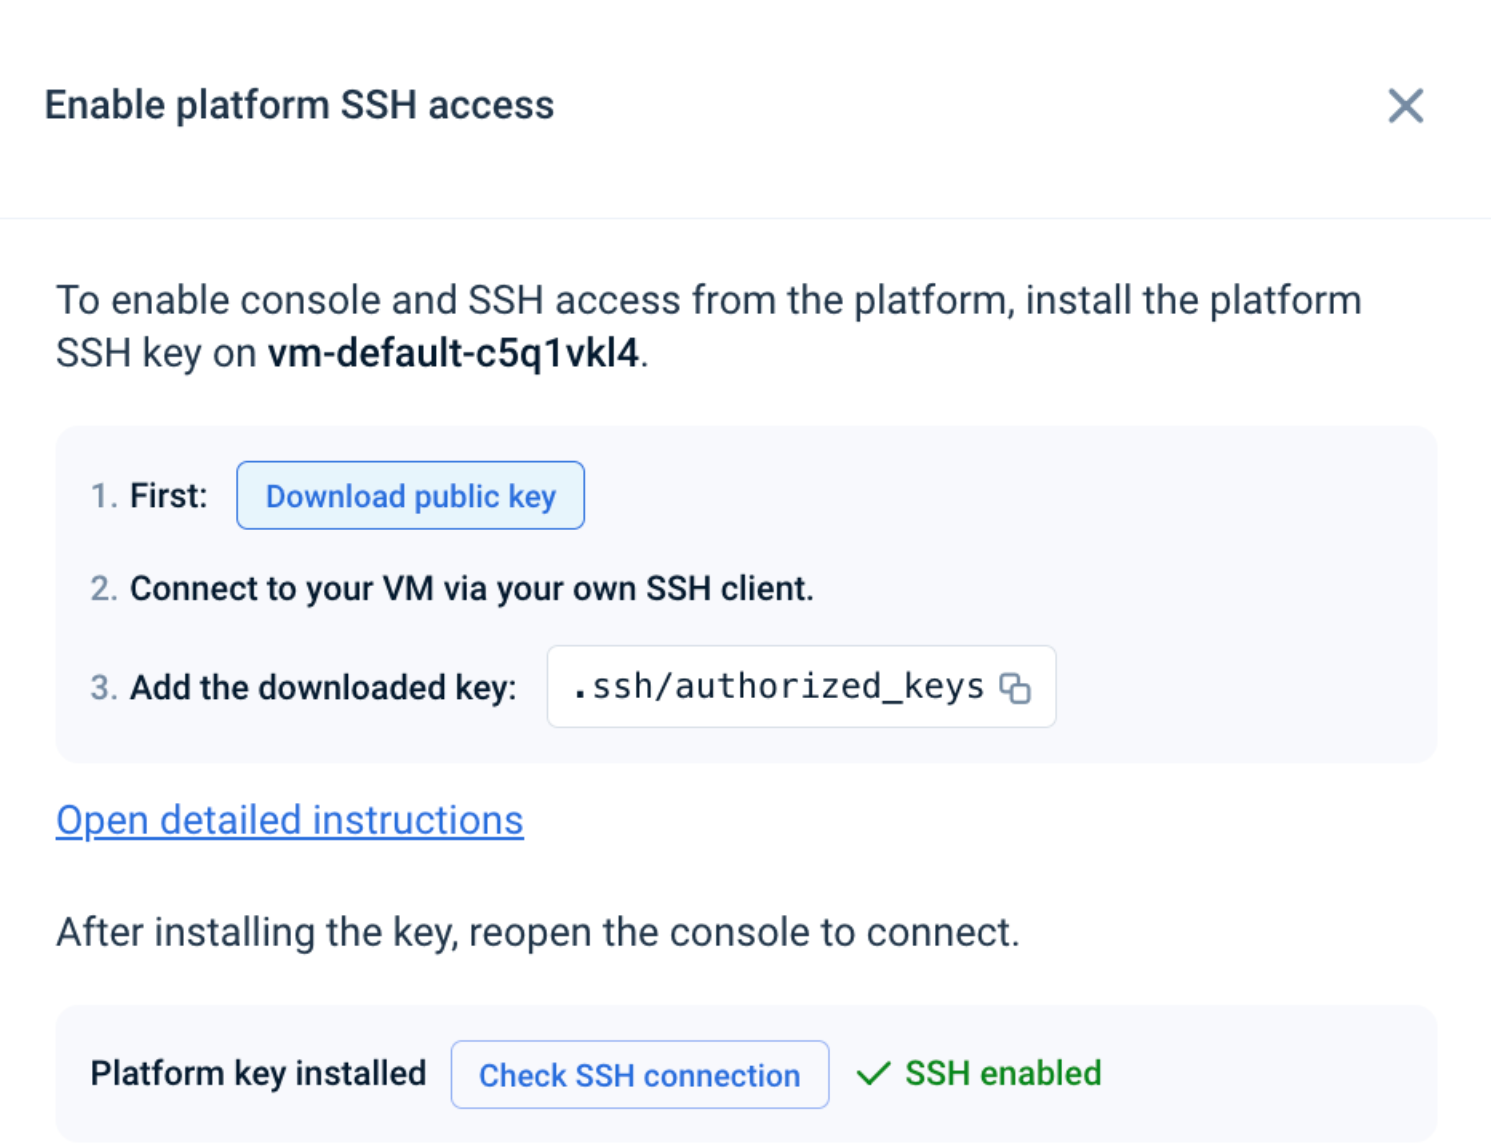
Troubleshooting
If Check SSH connection reports Connection failed, work through this list, then try again.
Key added for the wrong user — The key must be in the authorized_keys of the VM's login user (the user you sign in with over SSH), or in /root/.ssh/authorized_keys if you log in as root.
Incorrect permissions — ~/.ssh must be 700 and authorized_keys must be 600, both owned by the user. Re-run chmod 700 ~/.ssh and chmod 600 ~/.ssh/authorized_keys.
SELinux context (RHEL-based systems) — Run restorecon -Rv ~/.ssh. A wrong SELinux label makes SSH ignore the key without any obvious error.
Key split across multiple lines — A public key is a single line. If a copy/paste introduced line breaks, remove the key and add it again as one line.
SSH port blocked — Make sure the VM's security group allows inbound SSH (TCP port 22).
SSH server settings — In /etc/ssh/sshd_config, PubkeyAuthentication must be yes, and any AllowUsers / AllowGroups restrictions must include the login user. Restart the service after editing: sudo systemctl restart sshd (or sudo systemctl restart ssh).
VM is not running — Start the virtual machine and wait until it is fully running before checking again.
Last updated on 4 Jun 2026