
AWS setup guide
Prepare an AWS billing export in S3 and the read-only credentials emma needs to import your AWS costs.
Overview
This guide explains how to prepare your AWS account so that emma can access your billing data, and what credentials to provide during the connection setup.
emma reads your billing data from an S3 bucket you control — it never accesses your workloads or infrastructure.
Before you start
You need access to the following services in your master (management) AWS account:
Step 1 — Create an S3 bucket
This bucket will receive your billing export files.
- Open Amazon S3 and click Create bucket.
- Enter a Bucket name (e.g. my-company-focus-export). Choose any region.
- Leave all other settings as default and click Create bucket.
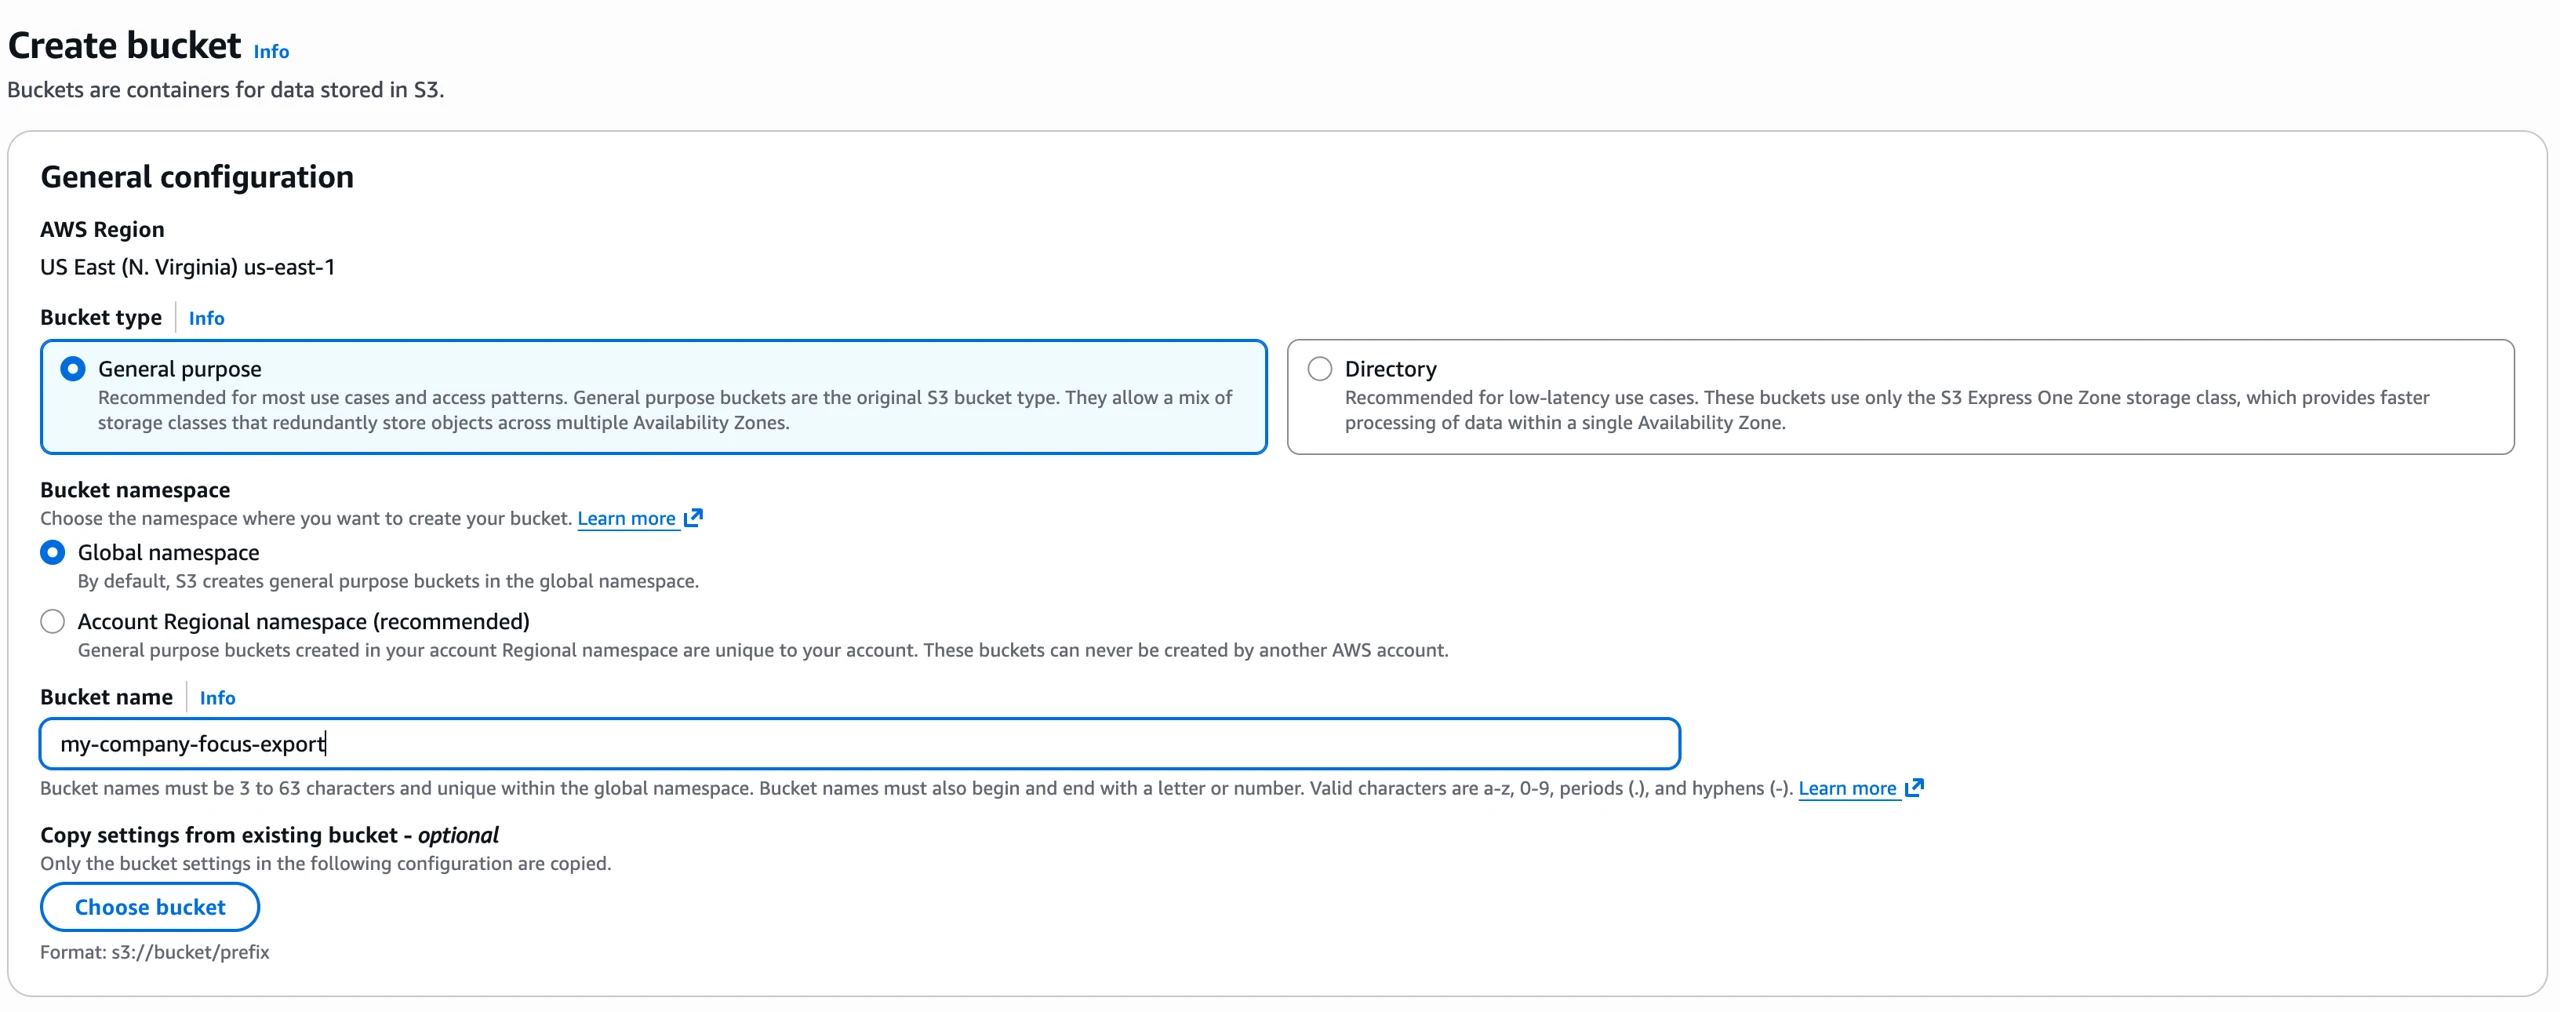
Save the bucket name — you will need it later.
Step 2 — Set up FOCUS billing export
- Open Billing and Cost Management → Cost and Usage Analysis → Data Exports.
- Click Create.
- Fill in:
- Export type → Standard data export
- Export name → any name (e.g. focus-export)
- Data table content → FOCUS 1.0 with AWS columns
- Compression type → Parquet
- File versioning: any format is applicable. Create a new data export file is better for keeping history of changes but consume more space as the files are not deleted.
- Under Data export storage settings, click Configure next to S3 bucket. Select Use existing bucket and choose the bucket from Step 1.
- Enter an S3 path prefix (e.g. billing). This is the folder path inside the bucket where files will be stored.
- Click Create.
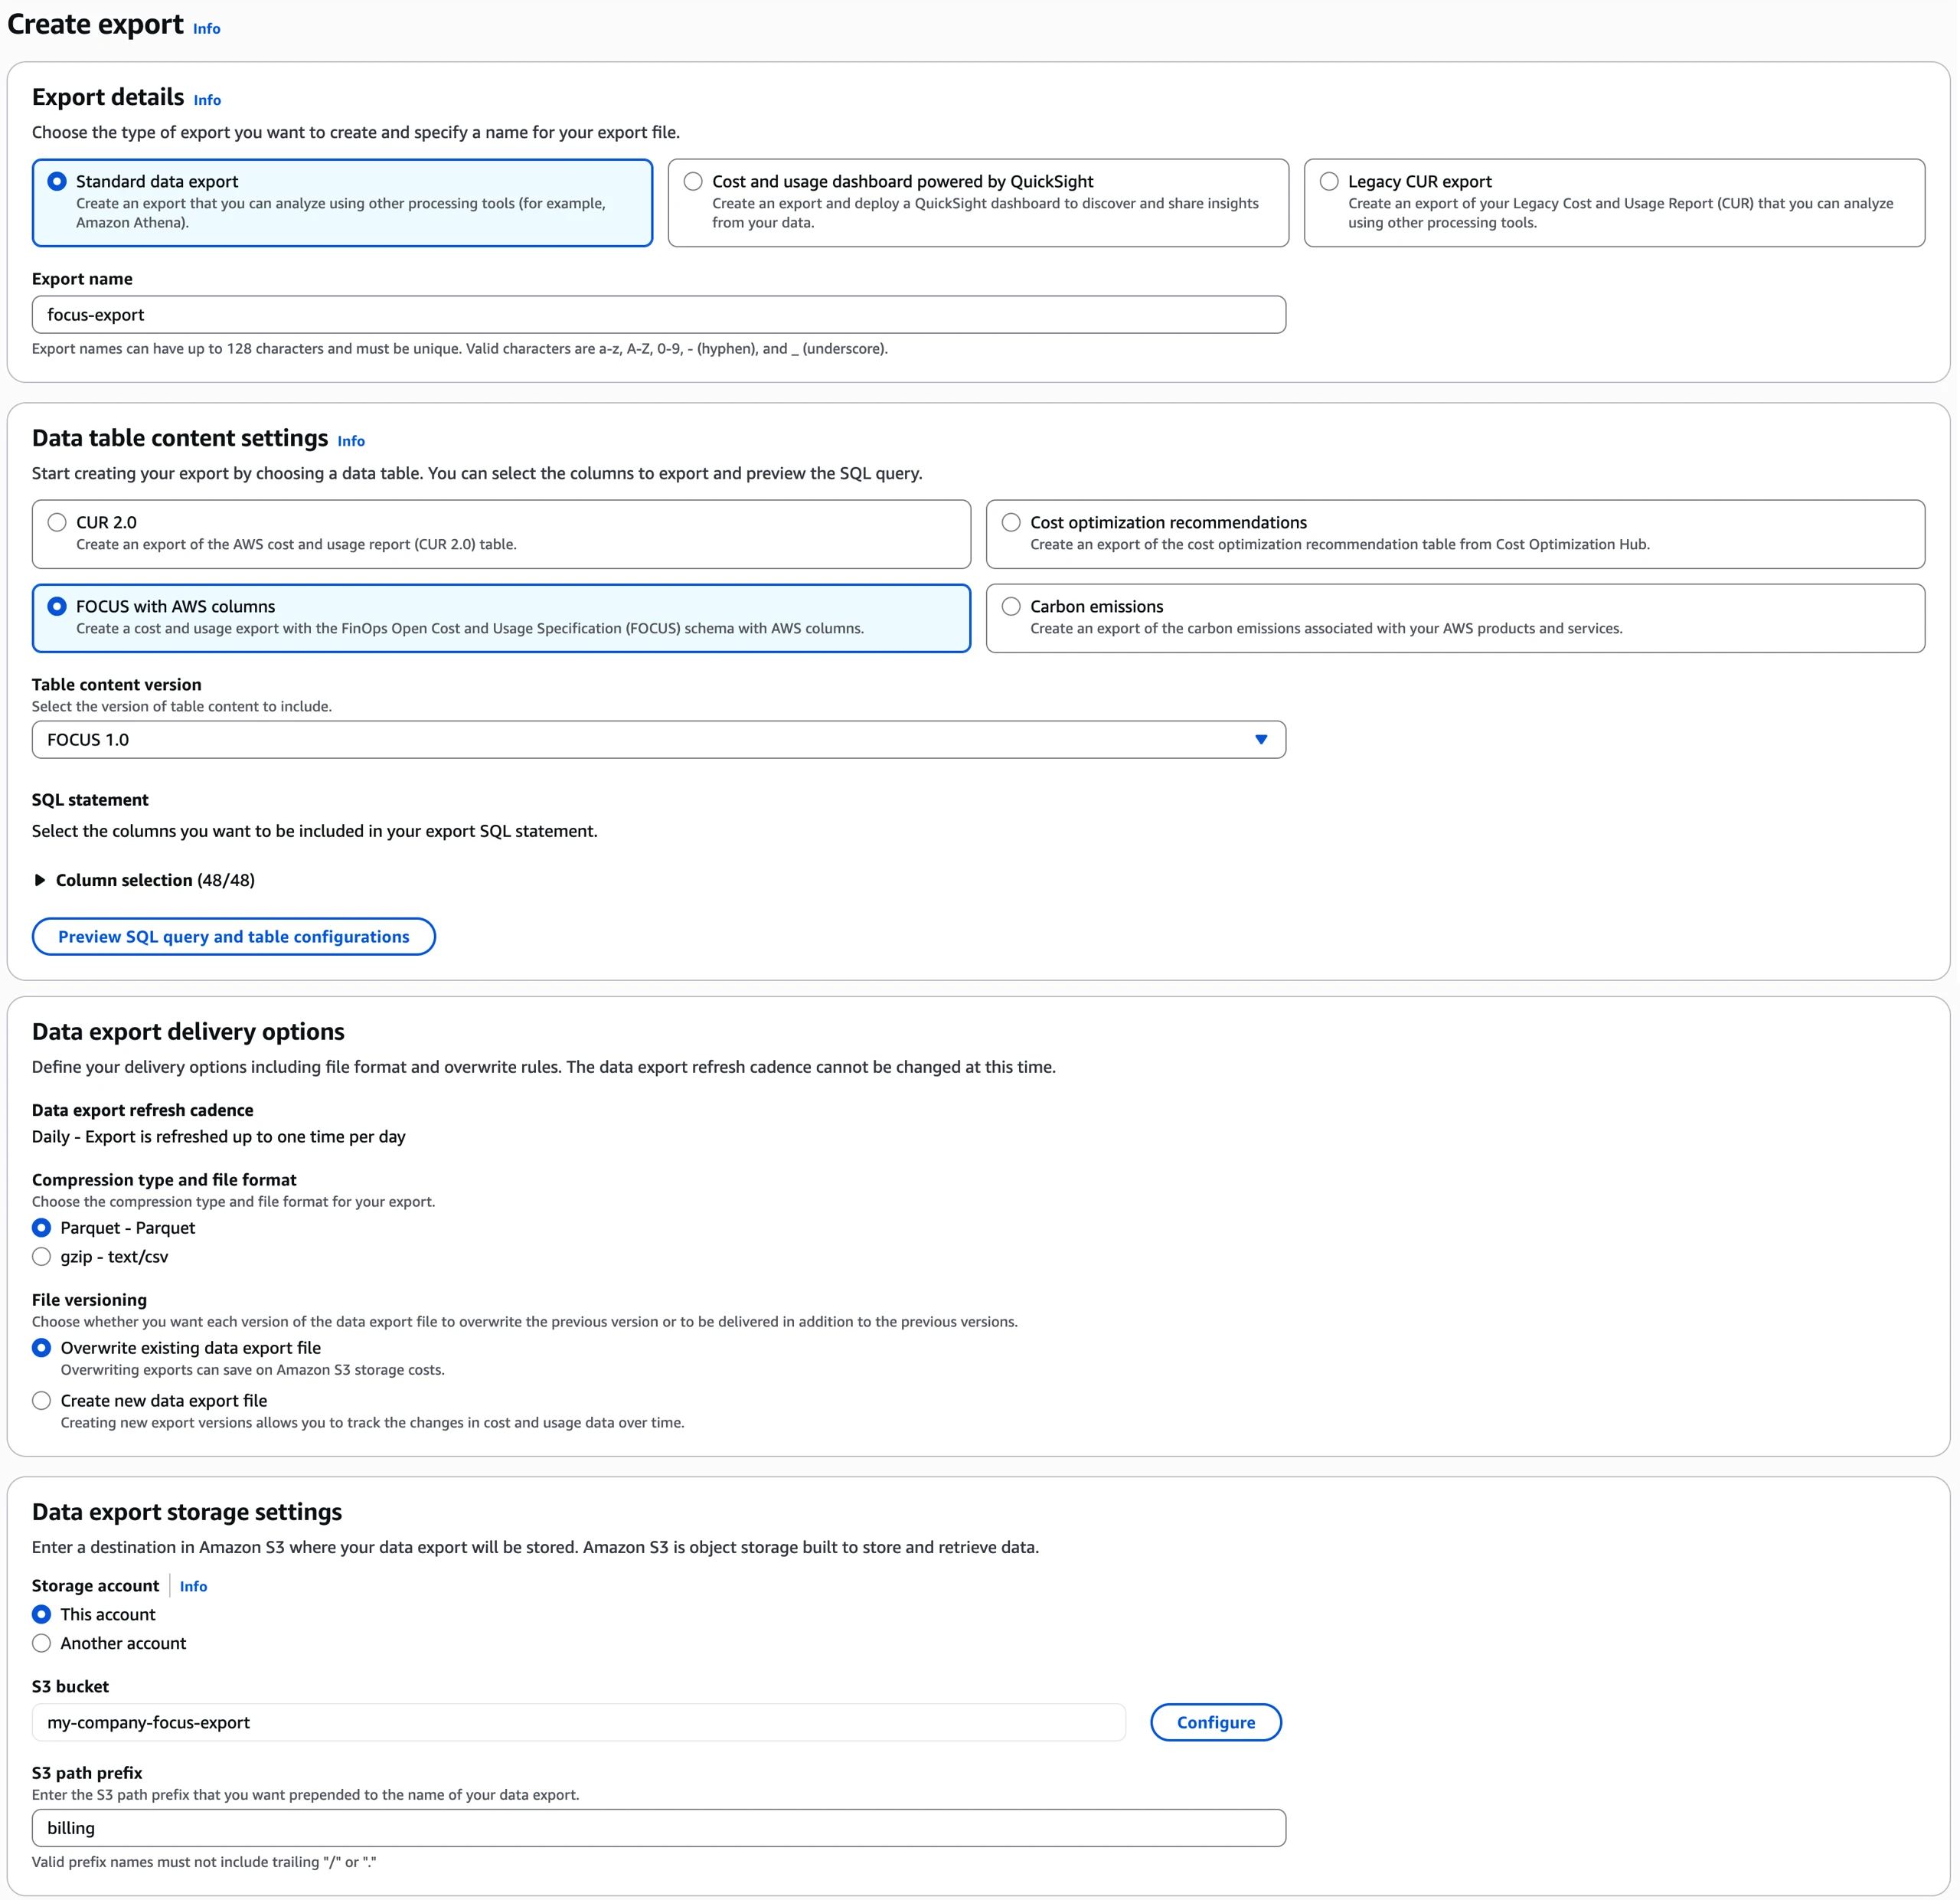
Save the Export name and the S3 path prefix — you will need them later.
Step 3 — Create an IAM user
This user will be used by emma to access the S3 bucket — it has no other permissions.
- Open IAM → Access management → IAM Users → Create user.
- Enter a User name (e.g. emma-service-user). Do not enable Console access.
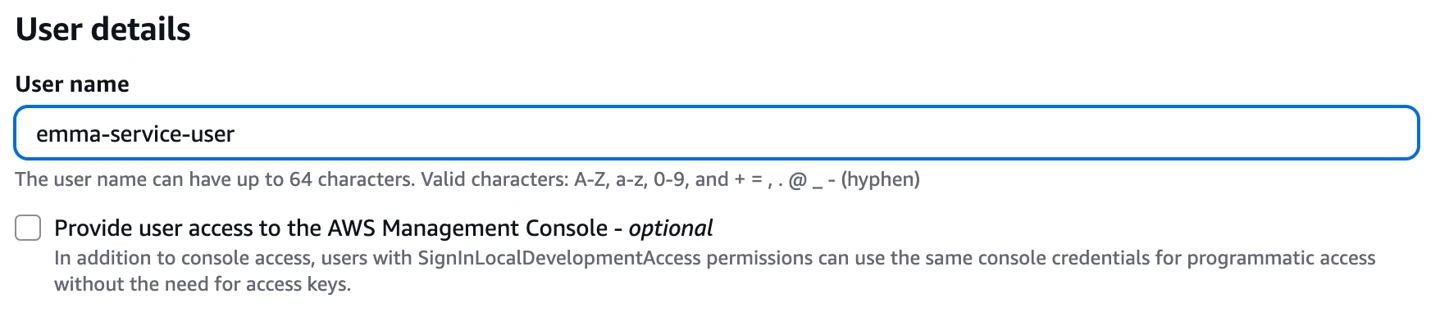
- Click Next.
- Under Set permissions, select Attach policies directly → Create policy.
- Paste the following policy:
{
  "Version": "2012-10-17",
  "Statement": [
    {
      "Effect": "Allow",
      "Action": "s3:*",
      "Resource": [
        "arn:aws:s3:::<s3_bucket_name>",
        "arn:aws:s3:::<s3_bucket_name>/*"
      ]
    }
  ]
}- Name the policy (e.g. emma-s3-read-policy) and click Create policy.
- Attach the newly created policy to the user and click Next → Create user.
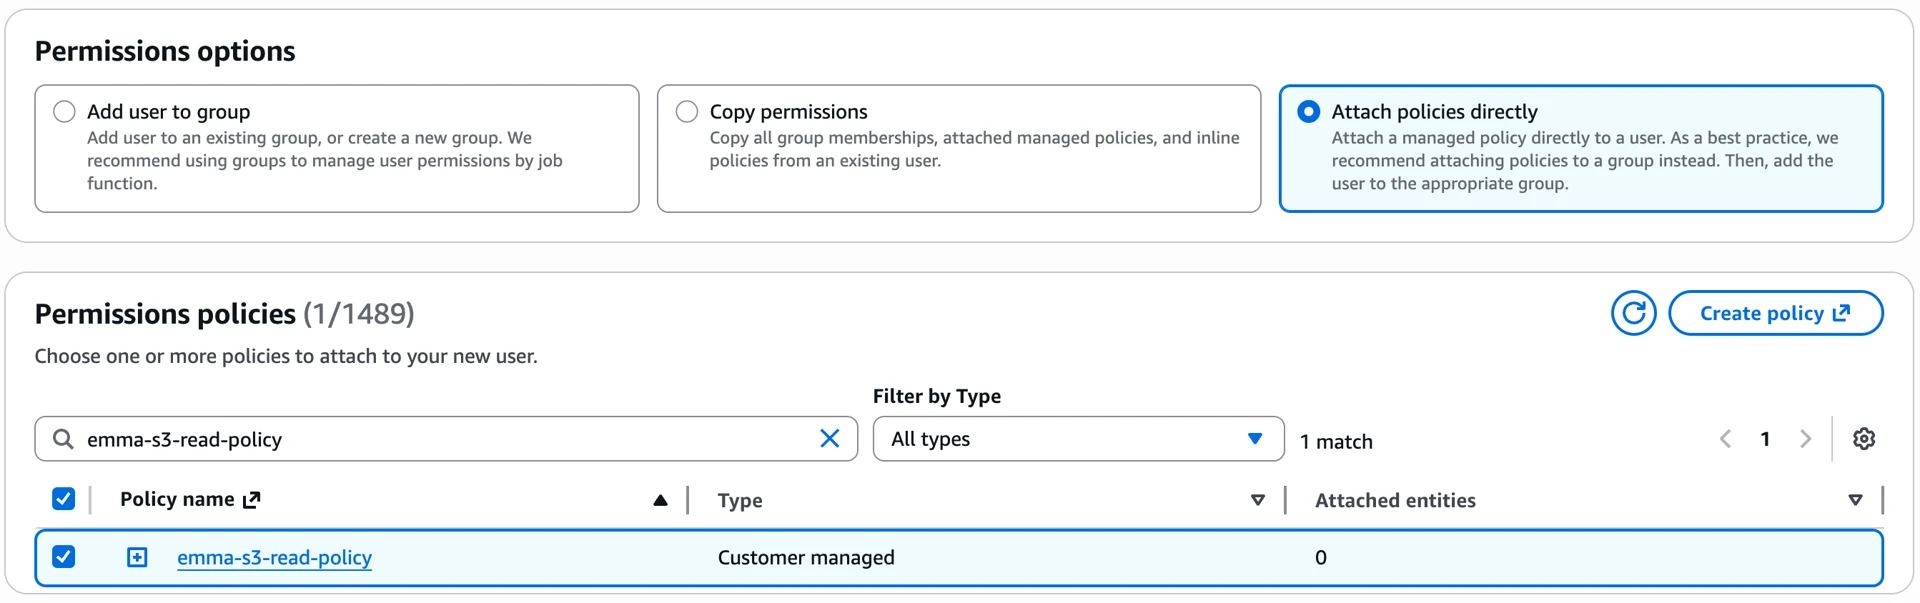
Step 4 — Create access keys
- On the Users page, open the user you just created.
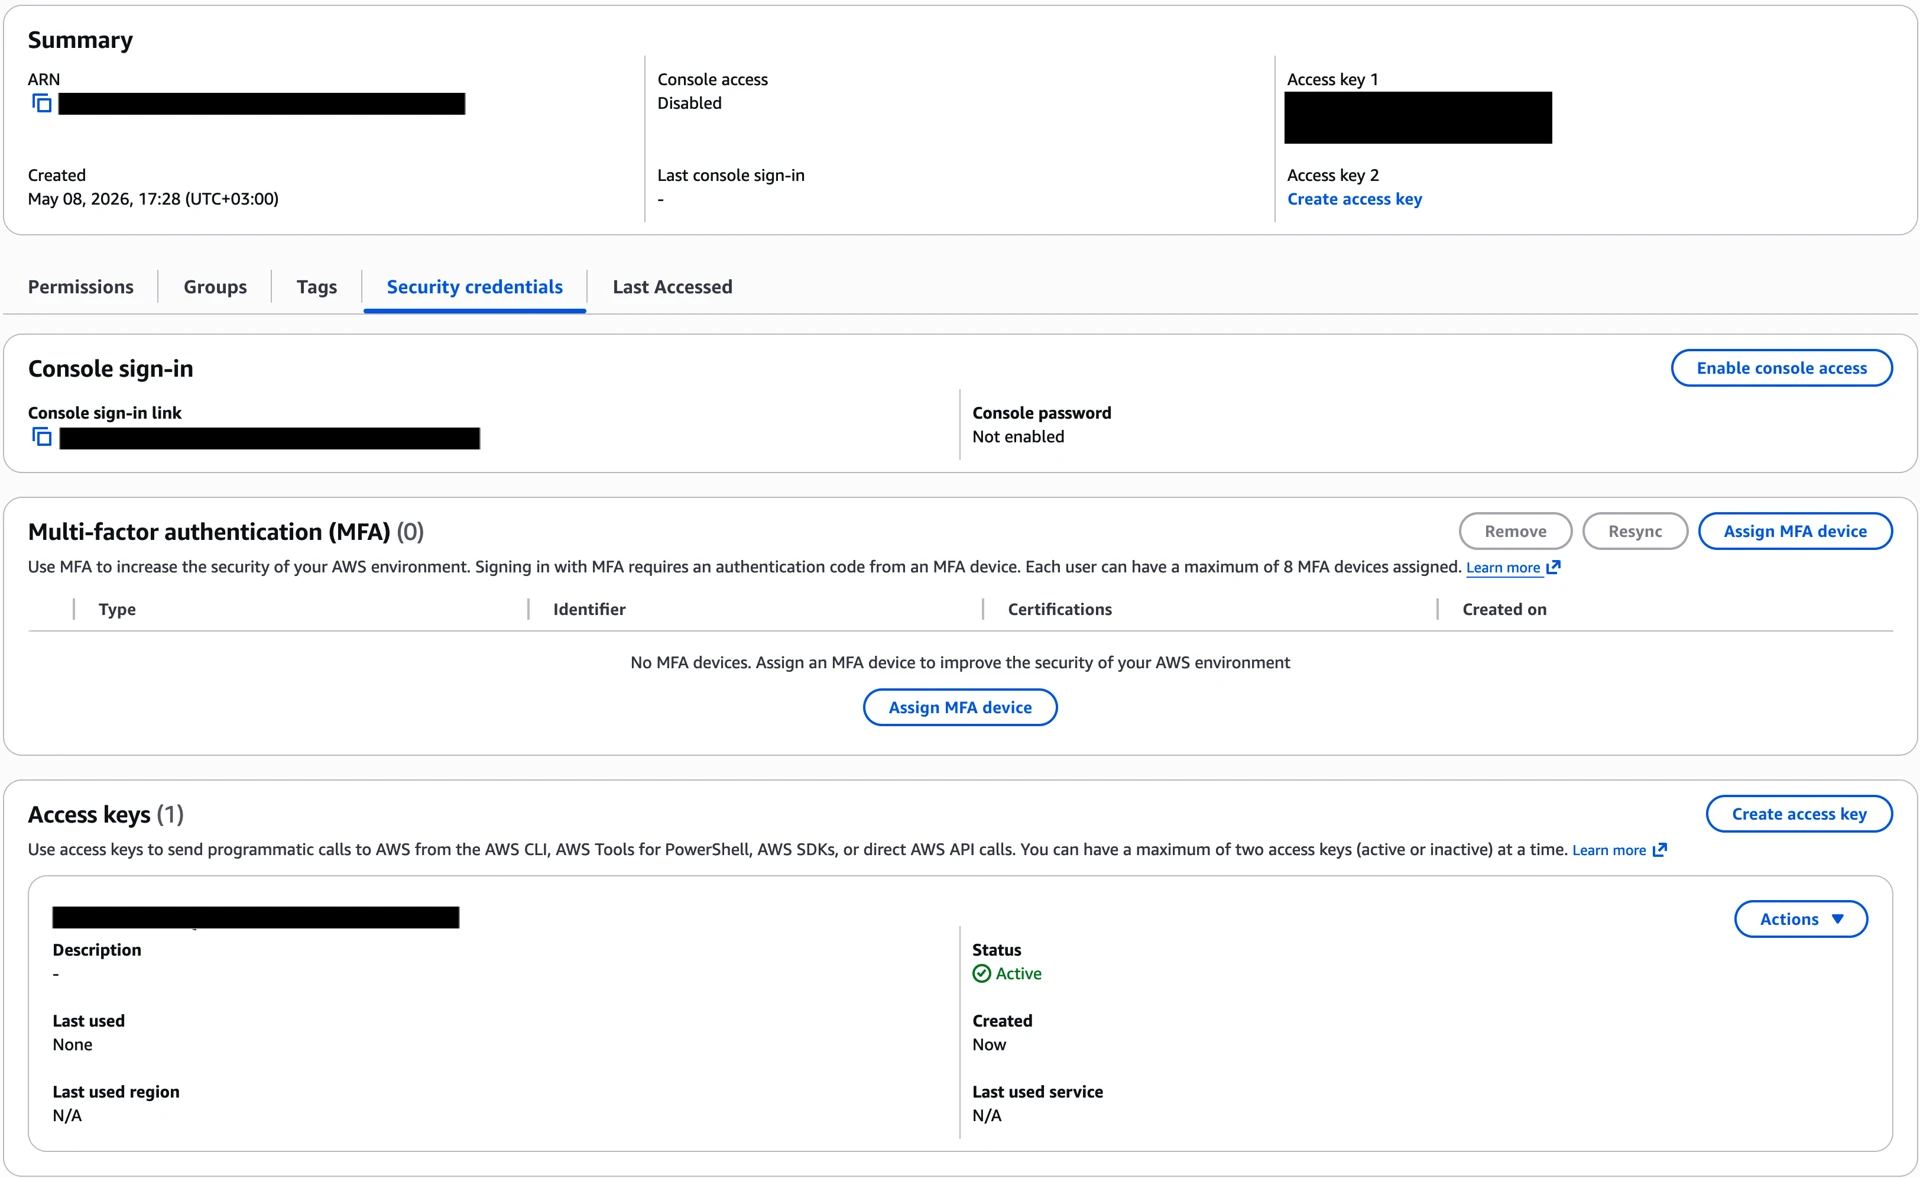
- Go to the Security credentials tab.
- Scroll to Access keys → Create access key.
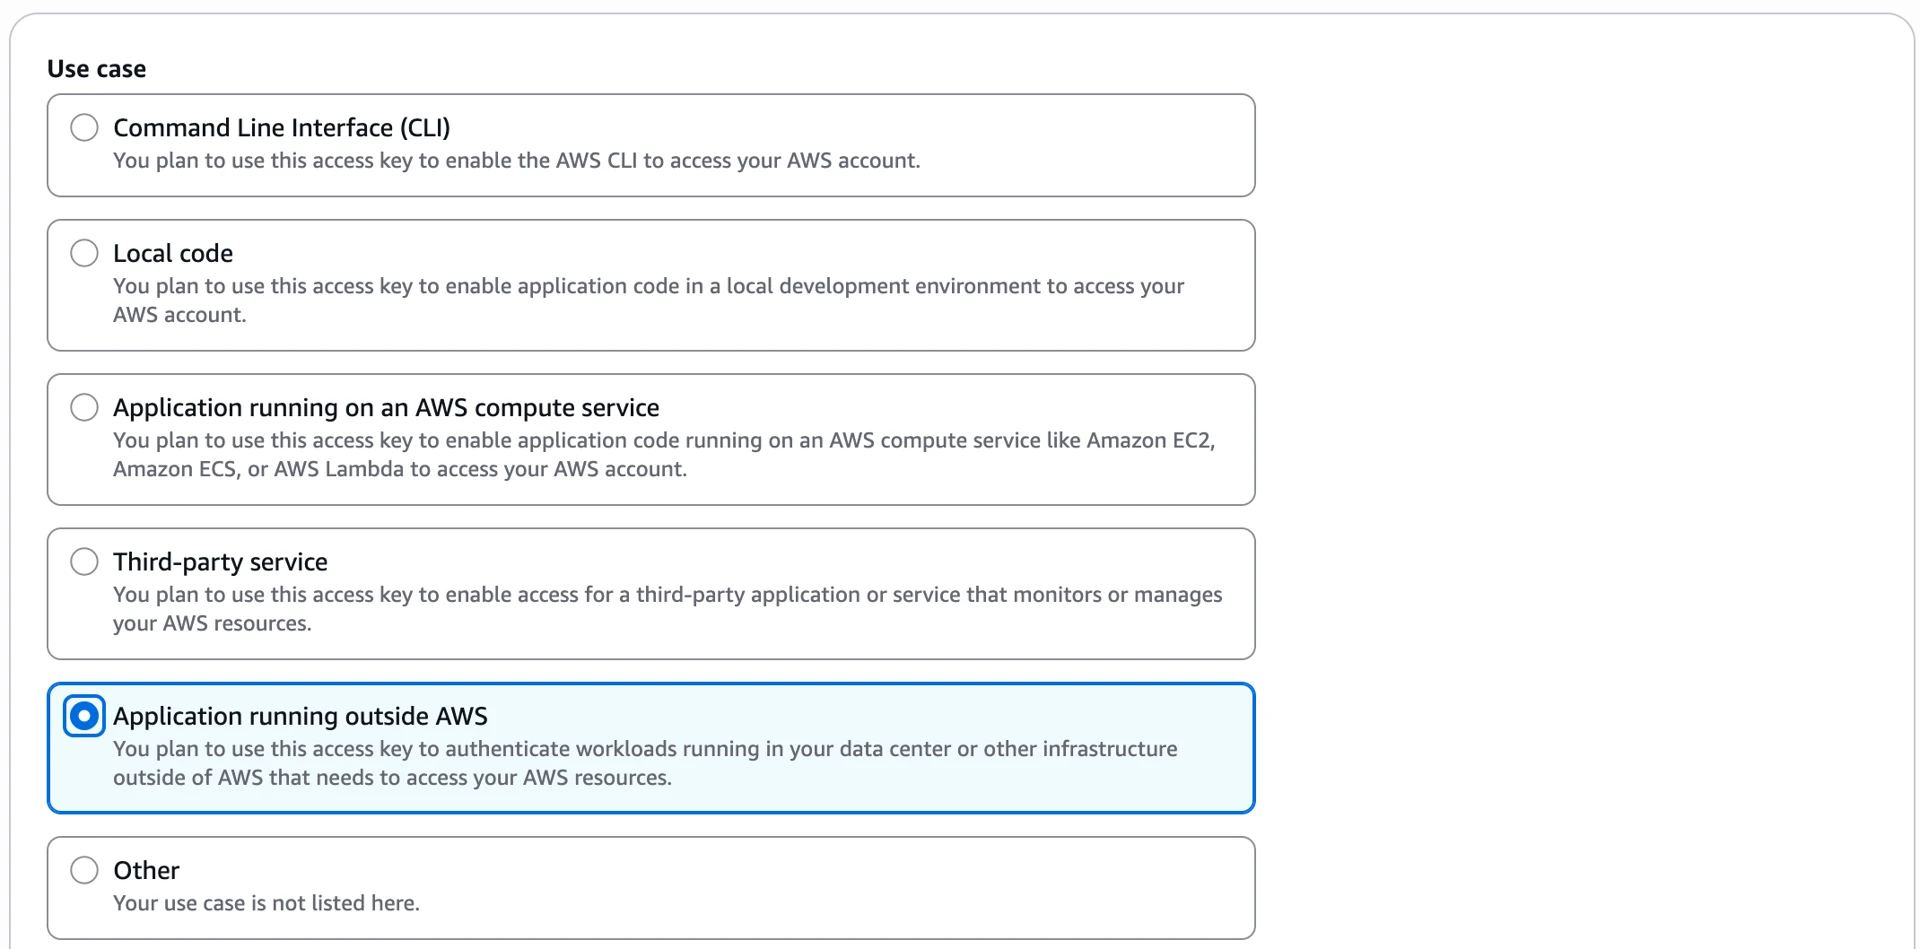
- Select Application running outside AWS → Next → Create access key.
- Copy the Access key ID and Secret access key.
The Secret access key is shown only once. Copy it immediately.
What to enter in emma
| Field | Value |
|---|---|
| Access Key ID | Copied from Step 4 |
| Secret Access Key | Copied from Step 4 |
| S3 bucket name | Bucket name from Step 1 |
| S3 path prefix | Prefix from Step 2 (e.g. billing) |
| Export name | Export name from Step 2 (e.g. focus-export) |
Last updated on 12 Aug 2026