
Azure setup guide
Prepare an Azure billing export in a storage container and the read-only credentials emma needs to import your Azure costs.
Overview
This guide explains how to prepare your Azure account so that emma can access your billing data, and what credentials to provide during the connection setup.
emma reads your billing data from a storage container you control — it never accesses your workloads or infrastructure.
Before you start
You need access to Azure Portal with permissions to:
- Create Storage Accounts
- Create Cost Management Exports at your billing scope (EA Enrollment or MCA Billing account)
- Create App Registrations in Microsoft Entra ID
Step 1 — Create a Storage Account and Container
The container will receive your billing export files.
- Open Azure Portal → Storage accounts → + Create.
- Fill in:
- Subscription, Resource Group, Region, Performance, Redundancy: according to your company policy.
- Storage account name: any name (e.g. focusexportaccount)
- Preferred storage type: any type, Blob Storage or ADLS Gen2 are both supported.
- Click Review + create → Create.
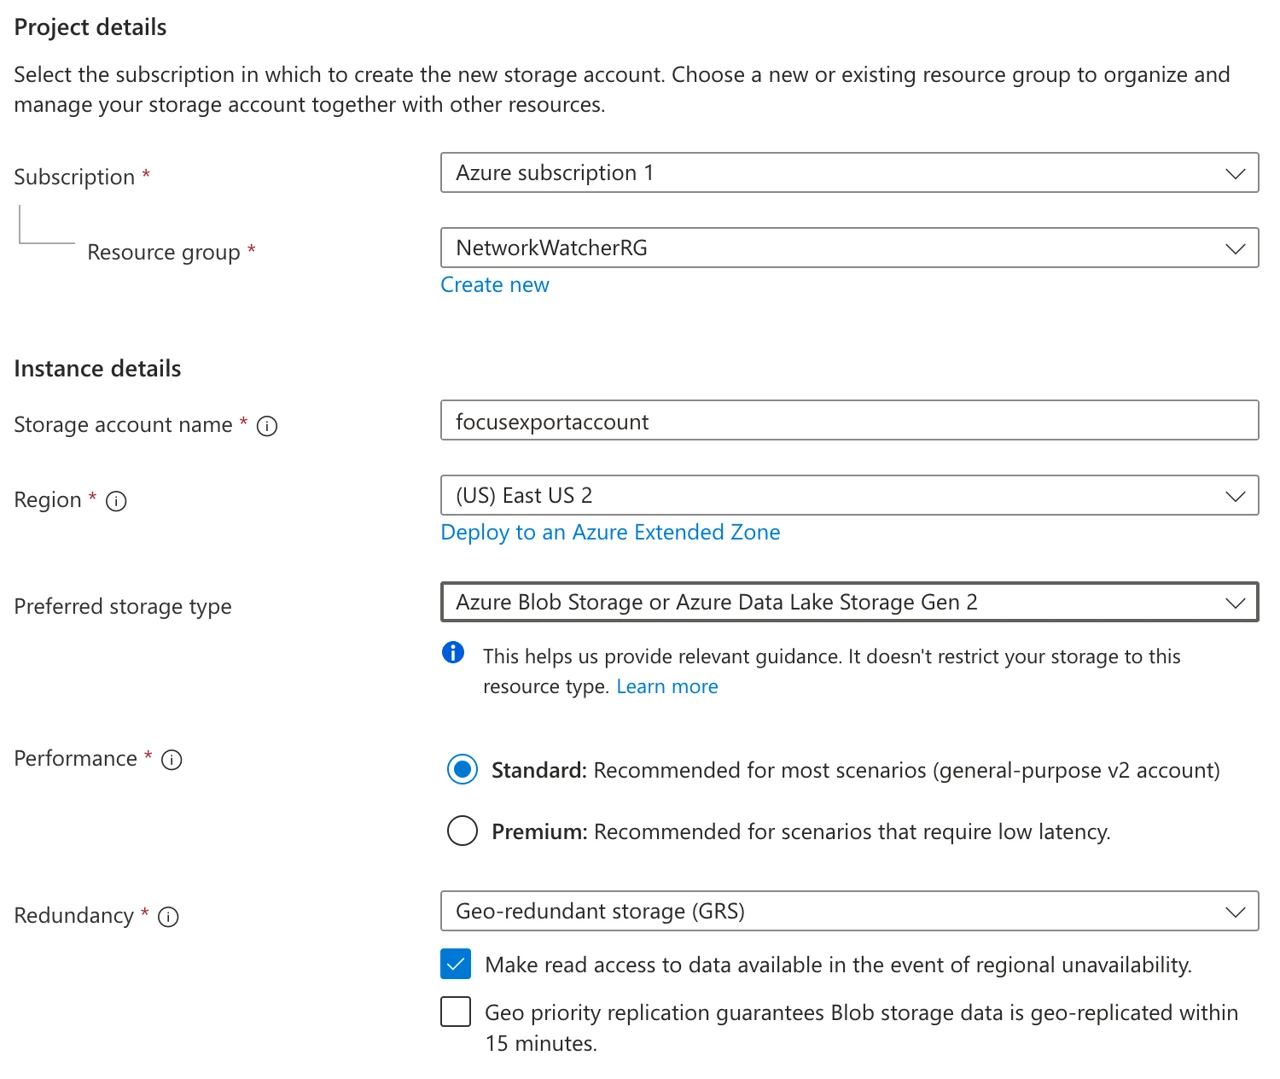
- Once created, open the storage account → Data storage (in left menu) → Containers → + Add container.
- Enter a Container name (e.g. focus) and click Create.
Save the Storage account name and Container name — you will need them later.
Step 2 — Set up FOCUS billing export
- Open Cost Management + Billing → Billing scopes.
- Select the appropriate scope:
- EA (Enterprise Agreement): choose your Enrollment scope. MCA (Microsoft Customer Agreement): choose your Billing account scope.
- Go to Settings → Exports → + Create.
- Select template: Cost and usage (FOCUS).
- In Datasets fill in Export prefix: any name (e.g. billing)
- Under Destination:
- Storage type: Azure blob storage
- Storage account: the account from Step 1
- Container: the container from Step 1
- Directory: enter a path prefix (e.g. billing) — this is your Directory path
- Format: Parquet
- Compression: Snappy
- Click Review + create → Create.
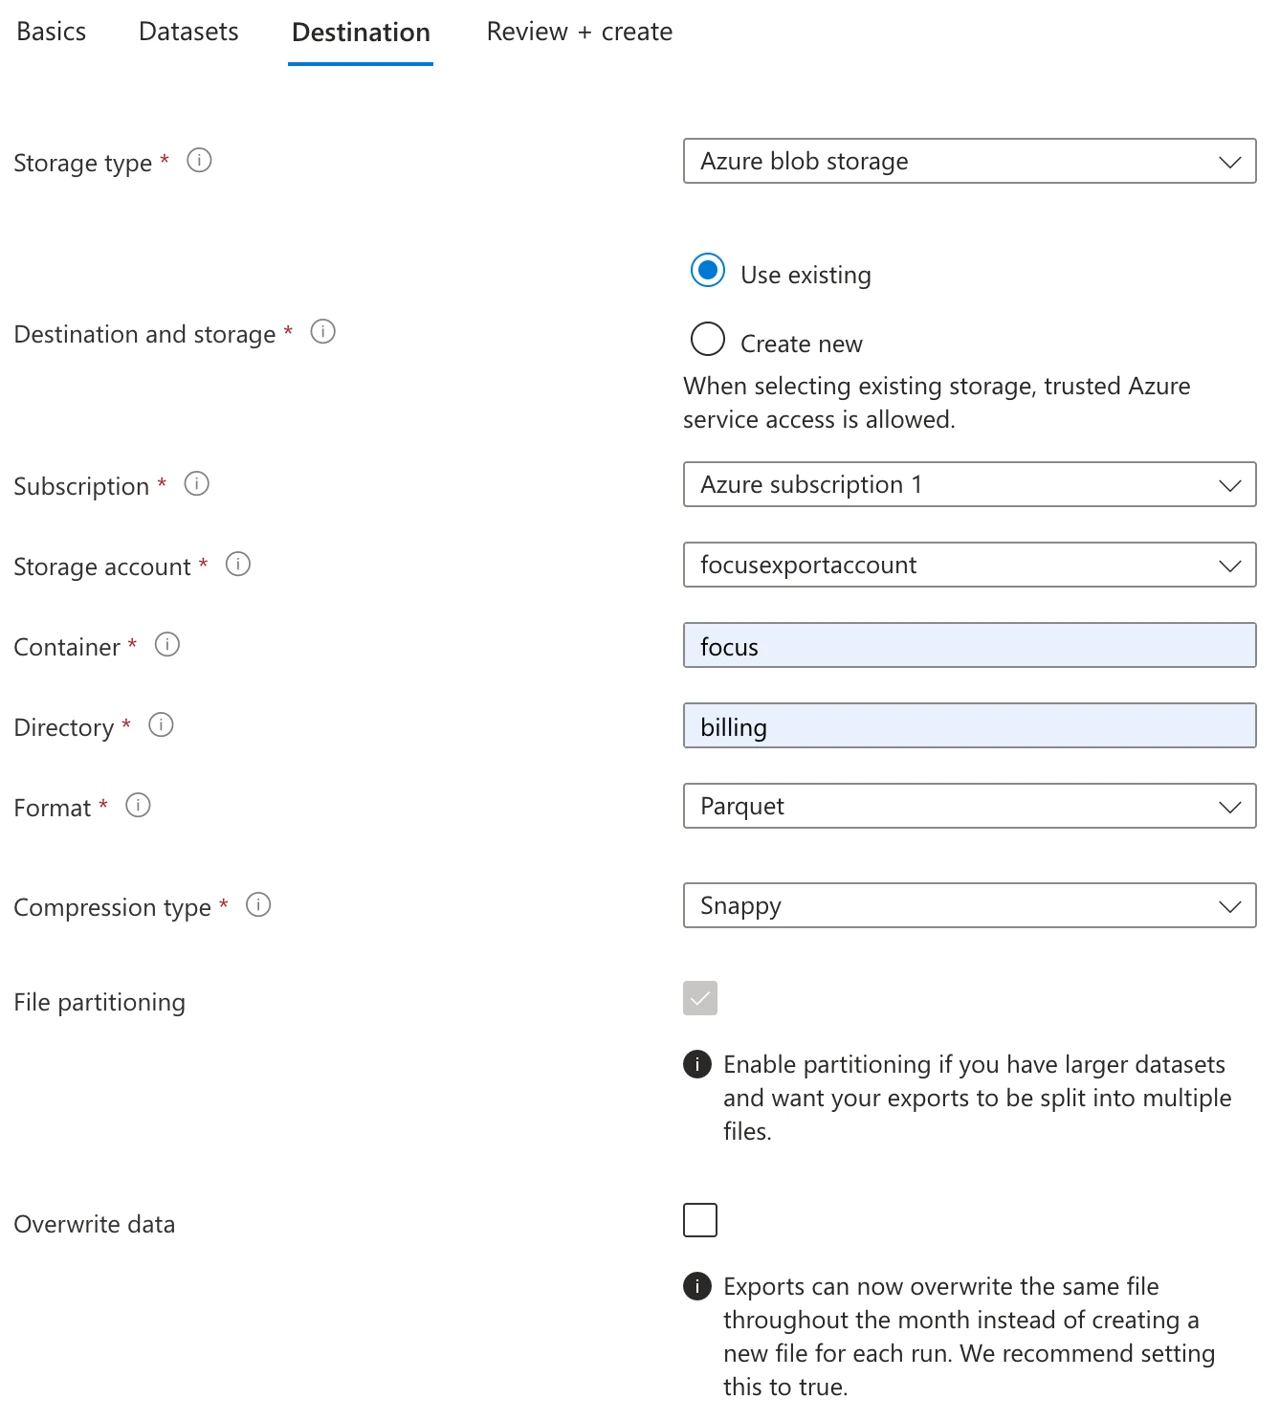
Save the Directory path — you will need it later.
Step 3 — Create an App Registration
This creates the service identity that emma will use to authenticate.
- Open Microsoft Entra ID → Manage (left menu) → App registrations → New registration.
- Enter a Name (e.g. emma-service-app). Leave other settings as default.
- Click Register.
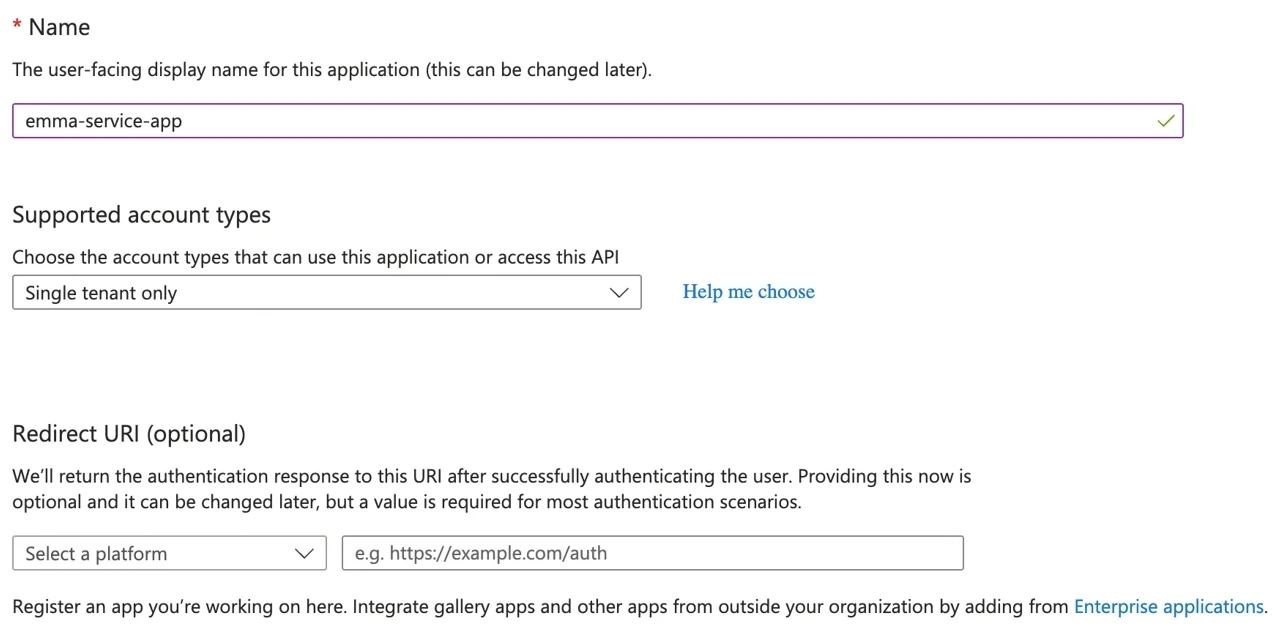
Step 4 — Copy Tenant ID and Client ID
On the Overview page of the newly registered app, you will see:
- Application (client) ID — this is your Client ID
- Directory (tenant) ID — this is your Tenant ID
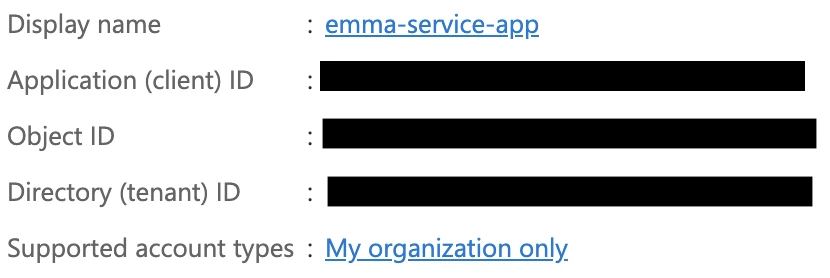
Copy both values.
Step 5 — Create a Client Secret
- In the same App Registration, go to Manage (left menu) → Certificates & secrets → New client secret.
- Enter a description and choose an expiry period. Click Add.
- Copy the Value immediately — it is shown only once.

This value is your Client Secret.
Step 6 — Assign Storage Blob Data Reader role to the App Registration
- Open Storage accounts → your storage account → Containers → open the container from Step 1.
- Go to Access control (IAM) → +Add → Add role assignment.
- Role: Storage Blob Data Reader → Next.
- Members: click + Select members, search for your App Registration by name (e.g. emma-service-app), select it → Select.
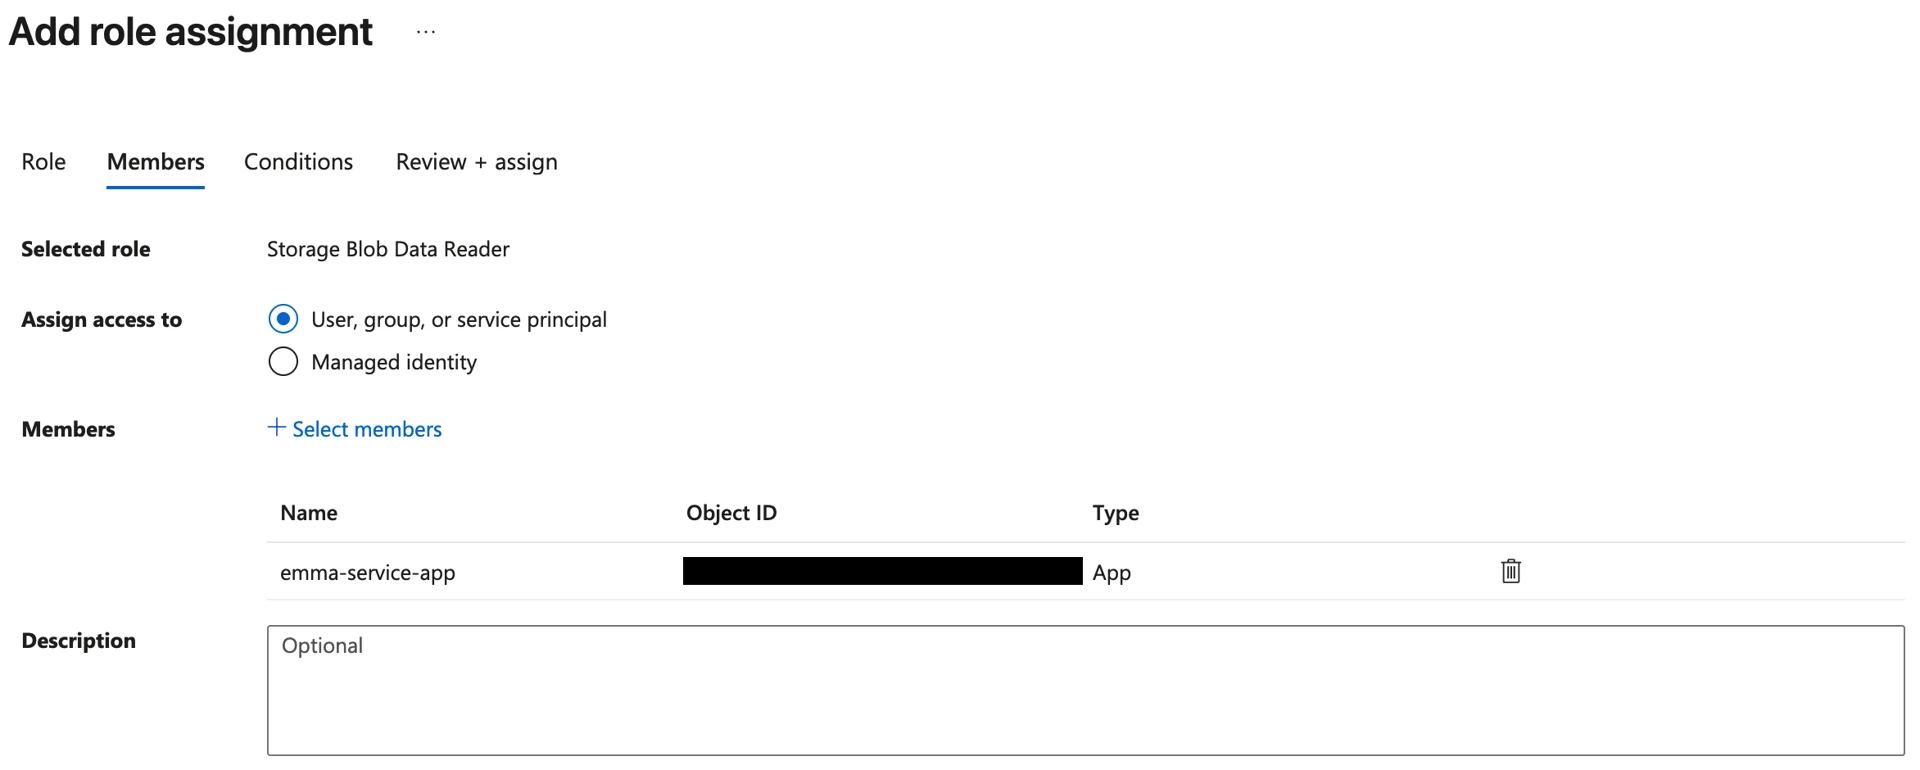
- Click Review + assign.
Note: Azure RBAC changes can take a few minutes to propagate. If emma reports a permissions error immediately after setup, wait 2–3 minutes and try again.
What to enter in emma
| Field | Value |
|---|---|
| Tenant ID | Copied from Step 4 |
| Client ID | Copied from Step 4 |
| Client Secret | Copied from Step 5 |
| Storage account name | Storage account name from Step 1 |
| Container name | Container name from Step 1 |
| Directory path | Directory from Step 2 (e.g. billing) |
Get GCP credentials
Last updated on 12 Aug 2026